Showing posts with label tutorial. Show all posts
Monday, March 2, 2009

Tutes...

* Valentine Angel Heart Pendant and Earrings Part 2 by White Gothic Studios
* Wilton's Course II Finale Cake 05/29/08
* Ku-ki Shop Jewelry - Polymer clay by Ku-ki Shop
* It's cute: Kawaii clay part 2 by alleycat1694. It so hard to find tutes on how to make cute bows... This one looks ok...
* such a cute tutotial of a little people charm: [[Chibi Charms]] by yourazndezire
* Sun Catcher Eyes: Free Patterns for Crochet

CraftyGurl
Saturday, February 7, 2009

Linky Dinkies...

* How to: Needle Felting, Needle Felted Heart and her site.
* channel: Nimibirla
* channel: TheCraftsChannel
* channel: floresita and her website

pulpshushi a blog that is totally cute and which I found lip balms that's totally in the shape of yummy French Desserts... which had originally seen @ one of my flickr contacts...

* twistedkneads.com
* Maelindesigns
* How to Make Cold Porcelain
* love love this Cupcake Necklace from Tizzalicious
* tutorial for a violet by Ernesto... how sweet...

CraftyGurl
Thursday, December 18, 2008

Embossing info...

MSDS is an ingredient of embossing powder... It usually is in lazer printer toners. fine plastic can be also another ingredient.

Tip from "Embossed Stamped Images"
eliminate embossing powder sticking to stuff... use baking soda, cornstarch or powder in an little piece of fabric and puff puff the surface with your bundle if you don't want the excess embossing powder on the surface you're going to emboss... :)

Just went around to the bag of pop cans and took all the tabs off... Want to try this tutorial:
Need:
* Clear embossing ink
* Soda pop tabs
* Colored embossing powder
* Heat embossing tool
* A pair of tweezers

1 Coat tabs w/ embossing ink [fronts only]
2 Use tweezers for this: dip tabs in embossing powder.
3 Heat tabs [hold them w/ tweezers] with gun until powder is melted. HOT so careful!
4 Repeat it 2 or 3 times if need be.

The project were the tutorial is, was using them as buckles.
CraftyGurl
Friday, November 14, 2008

Very interesting...

June Bassant , Mississagua, On - yummy cakes picture, that made BFG go on a fridge-hunt for cheesecake and ice cream....

Ernesto Baldini - Ernesto's pictures - Ernesto's blog - lemon pie tutorial

Luny

Jean Bernard

CraftyGurl
Monday, September 15, 2008

?tuts n a little K-stuff!

* Punch n fun vid
* boîtes avec TopScore Multiboard @ HSN but it comes with the envelop plate.

Just too funny, found out Stephane Cherki [1955] was the one who invented/created the cheque cadeau and introduced this idea to companies in 1983 and from there it took off like fire... They had him on a tv show in France [video]... Pretty cool! A French Invention!

off topic... Watching - We got married - 우리결혼했어요, so freaken' funny!!! How I number my couples:
Crown J and Soe In Young
Solbi and Andy
Alex and ShinAe
Kim HyunJoong and Hwangbo

video of Replay n Umbrella w/ Shinee (샤이니) n Seo In Young (서인영)! [video] Wonder Girls & JunJin
Sunday, September 14, 2008

Just finds...

Glass etching video that shows how to use armour etch and it`s on sale at ebay. Niji brushes? those suckers look like a great BUY! Random site found while looking for Arabic gum: amateurcocktailguy. Micro Pearl Ex by Jacquard. Heard on a utube vid about the auto-o-ring to make tags but can't quite remember the video... Need to get my hands on a wax melting machine [electric wax melter, heat plate]:
* Ranger Melting Pot @ FranticStamper
* Suze's vblog
* Ranger Ind. Channel
* Ranger website
* UTEE

* Suze Weinberg shows the Hot Wax Stylus Tool

* soap molds
* DIY wax melter

Make ur own embossing template by using:
plastic not to thick
hole punch the smallest u got
take the plastic and make ruler markings how far apart you want the holes. length/width wise. punch holes
then there you got yourself a embossing template...

Lisa Yuen flowers [ got the info from the UT-vid-partI n partII]
20 sheets of paper
pot
3-4 qts of water
blender
big huge sponge
cookie sheet
rip paper, then boil it in a pot of water for about an hr., blend: 1 cup of mush w/ 2c of water until it becomes a smooth. you press it out on to the cookie sheet and press with the sponge, wringing out the water until the paper [paste] becomes 1mm thick. After a few hrs you roll it out more with a rolling pin to take out the imperfections. Then let air dry over night.
to paint you need this mixture for 1 flower [20 petals of small, med n large]:
2 c of water
1/3c acrylic glaze
1 tsp of paint [what ever color u wish]
iridescent
don't forget gloves...
dip the flower petals into the mixture... and place in a plastic wrapped cookie sheet. a couple hrs later form your petal [bend n curve it a little] to give it some shape.
glue gun
paper
scissors
bulb: made out of the paper
strip of long paper you fringe the ends then roll it back again and spread the thin slit. You glue it to the top of the bulb and add 5 small petals. keep building it, always using your glue gun, until you get your beautiful flower. you can use cable or wire depending how big the flowers are.
Thursday, September 11, 2008

How to - Cold Porcelain

Cold Porcelain Materials
• Corn Starch - 1 Small Cup
• Glue - White Type, 1 Small Cup [Elmer's Glue]
• Water - ½ Cup
• Glycerine Cream - 1 Teaspoon For The Hands
• Glycerine - 1 Teaspoon Liquid
• Wooden Spoon
• 1 Non-Stick Pan

Got from CDHM forum
Make CP - download the pdf file
Another really good tutorial on how to make Cold Porcelain by Sangeeta @ Peter Holland Site...


Left a comment @ ClaraLuna's blog [but needs to be accepted] sometime yesterday. Saw the photo [rainbow] from the slide show on my sidebar:
how totally cute! :)
was putting up a photo slide show and your photos came about... had to check your stuff out... you are so artistic! :) thank you for sharing your lovely work with all of us in the web.
I would love to try to do the rainbow cane... my first try w/ a can, it was awful... but would love to try your gorgeous cane... :) it will be for personal use not for sale. I'm a hobbiest/crafter that loves to learn, learn...
ciao-meow!
~ craftygurl ~


only ships within the US - eclecticpaperie.com - info [_a_t_]eclecticpaperie[_._c_o_m]

FineLiving - Home Edition Resources
Monday, September 8, 2008

Info.

But besides that I didn't think beyond that... I have bought 2 kinds of mold maker: mold builder by castin'craft and silicone moulding paste by Gedeo.

Info.:
Die cut machines
Die cut machines

stamp tutorial

want to get:
bezel cups
patina
pmc
Tuesday, September 2, 2008

Flower Tutorial


*~*~*~*~*~*~*~*~*~*~*~*~*~*~*~*~*~*~*~*~*~*~*~*~*~*~*~*~*~*~*~*~*

1. Materials you'll need:


* Punches
* Paper [color or white]
* brushes
* Gloss Varnish
* Pearl-Ex Powders [your choice of colors]
* Fine Glitter [optional]
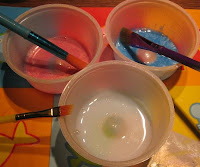
* Containers [for varnish n water]
* Cardboard [for protection]


2. Set up your work area


3. Add varnish to containers and would be good to have some water and some paper towels for blotting brushes... :)


4. add pearl-ex powders and glitter to varnish


5. Mix very well...


6. Brush on paper let dry...


7. Apply as many coats as you wish. I usually apply 5-10, depends on how thick you want. If you don't want to apply to many you can use a little bit of acrylic paints to it. Always dry between applications.


8. Once dried, now you are ready to use your punches... :)


*~*~*~*~*~*~*~*~*~*~*~*~*~*~*~*~*~*~*~*~*~*~*~*~*~*~*~*~*~*~*~*~*